
In this article i will present you how i photographed an airshow and the gear that i used. I also recorded some videos. Air show and aviation photography is really challenging and tough but it is also a great experience that will make you a better photographer. Keep in mind that in my case i used two mirroless cameras. The Sony A6000 (aps-c) for static display and videos and the Panasonic Lumix G9 (micro four thirds system) to take photographs of planes in the air. The Lumix G9 has a contrast based detection autofocus system (DFD) and Sony A6000 an early implementation of the hybrid autofocus system. That made things even tougher especially when i had to capture aerobatic maneuvers. Lets now see the basics of air show photography and some tips to get the most out of our mirroless or DSLR camera and capture stunning images. Keep in mind that i am not a professional photographer and i am just sharing my personal experiences and my journey to aviation photography.

Items that you must have - Don't just bring your camera and a good telephoto lens
- Bring extra sd or cf cards. You will be surprised to see how soon your sd cards will be full. On the other hand there is always a chance of an SD card failure.
- Bring extra batteries. If you have a Sony a6000 or an A6400 you will need at least 4 batteries. In the case of my Lumix G9 two were enough. Do not forget that you may record some videos too. DSLR batteries can last longer though.
- Lens wipes and a dust blower. Sony cameras sensors are real dust magnets. It is very annoying to remove dust spots in post processing. Sensor dust is even worst for videos.
- A hat. Do i need to say why? Personally i prefer a boonie hat.
- Sunscreen. Yes. sunscreen. I learned it in the hard way and i ended up with sunburns.
- Snacks and water. Do not forget to stay hydrated.
- Download the file that contains the program of the airshow to your smartphone so that you will know soon enough what comes next and what settings to change in your camera
Optional Items
- Earplugs. Jet engines are loud. Personally i enjoy those sounds
- Sunglasses - They don't have to be aviator sunglasses :)
- A Folding chair
- A sun umbrella
- ND filters

The cameras and lenses that i used and why
My main camera to photograph static display aircraft's was the Sony A6000. My lens of choice was the SONY SELP18105G OSS. This lens has a zoom range (18-105mm) that can cover almost every shooting scenario. It is also a G lens and that means great build quality. Given the focal length it is compact and lightweight.
On the other hand this lens is great for video. It has Optical Steady Shot (OSS) to record shake free videos. It is not perfect but if you are careful it gets the job done. The zoom mechanism is quiet and smooth and the lens is able to keep a maximum aperture of F/4 throughout its whole zoom range.
The second camera i used was the Panasonic Lumix G9. Although the best choice would be the Panasonic Leica DG Vario - Elmar 100-400 mm, i could not afford it at that time. So i bought the Panasonic LUMIX G Vario 100-300mm F4.0-5.6 II. It is an image - stabilized telephoto zoom lens, it is dust proof and because of the Micro Fourd Thirds system crop factor (2X) its focal range is equivalent to a 200-600 mm of a full frame camera. In other words it's the same as for a full frame camera with a 200-600 mm lens but at a fraction of the cost.
The fact that i used two cameras does not mean that you should do the same. You can simply bring your Sony A6000 or your Lumix G9 or any other camera with just two lenses. One wide enough for static display airplanes and one with a good zoom range to capture good photographs of planes in flight.
Some examples and possible combinations: Panasonic Lumix G9, Lumix 12-60mm and Lumix 100-300mm. Its not impossible though to bring just one lens. The Lumix 14-140mm.
Sony A6000 or Sony A6600, selp18-105 or 18-135 and 70 - 350 mm. If you cant afford an expensive wide angle lens you can even get some decent stills with your kit lens.
The best moments of Athens Flying week Airshow (stills and video) from my YouTube channel - Part 2
Sony A6000 settings for photographs
Settings for Static Displays
This article is not meant to show you how to shoot static objects but i will make a brief mention of the settings i like to use.
- I switch the dial to Aperture Priority Mode
- Focus Area: Flexible Spot S
- Drive Mode: Single Shooting
- ISO is set to AUTO
- Aperture: I prefer the Middle Range Apertures : F/8-F/11
- Quality: Raw. Sony A6000 has enough dynamic range so i prefer to shoot raw. If something goes wrong with the exposure i can recover a lot of details later in post processing.
This is the settings i prefer. Feel free to experiment with your own settings. You might want to shoot using narrow or wide apertures.
Tips: If it is a sunny day you better not face towards the sun but away from it. Or at least try to have the sun to the side.You can also use a lens hood. If you are close to the subject you might wanna try and use the flash to light it. For example you may photograph your friends during the airshow with the planes behind them. Sony A6000 has a built in flash.
The best moments of Athens Flying week Airshow (stills and video) from my YouTube channel - Part 1
Sony A6000 settings for planes in flight - Ground-to-air photos
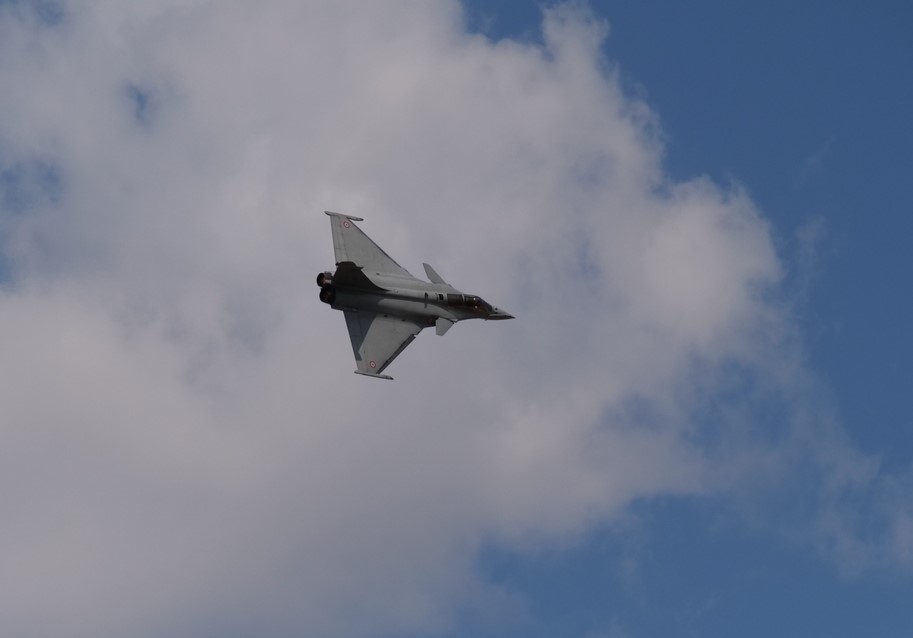
Fighter Jets - Propellers - Helicopters
- SteadyShot OFF. Disable your image stabilization or you may end up with blurry photos. The stabilization system will try to compensate your camera movement but in many cases it wont be able to keep up with your panning. You don't need need it anyway at such high shutter speeds.
- Focus Mode: AF-C (Auto focus Continuous)
- White Balance: Set it to AUTO. If you want warmer images select cloudy or shade.
- Smile - Face Detection: Disable it. You want to get the most out of you autofocus system. If you have it enabled your camera will try to locate faces so it will make the system slower.
- Focus Area: Center. I went old school. With this setting the camera will try to focus on subjects in the center of the frame. Usually the central focus point is the fastest. The center is also the sharpest point of your lens. The camera will not try to locate objects all over the frame so it will be faster and more accurate. If you feel that you the Central Focus Area is small you can try to use ZONE.
- Drive Mode: Continuous Shooting High. Although the autofocus system is fast its not always accurate.Some shots will be in focus but many others either be completely out of focus or slightly out of focus. Slightly out of focus shots may be OK for Instagram and Social Media but not for professional use. So the more shots the better.
- Enable the Back Button Focus. The camera auto-focus system will not have to struggle again and again to acquire focus each time the shutter button is released. Your shots will be more accurate. Keep in mind that if you decide to manual focus (lets say to record a video) it will make your life easier. But you will have to try it yourself to see what i mean. Just press the back button focus and then switch to manual focus.
- Metering Mode: I used Multi and i increased exposure by one stop. Some others prefer Center and some others Spot. Planes in flight is one of the rare instances of photography where you can use Center or Spot metering. Choose what suits you the most.
- Mode Dials: In my Sony Camera i chose Shutter Priority cause my lens is sharp wide open. If it wasn't i would either go Manual or i would choose Aperture Priority and i would raise ISO.
- Shutter Speed: For an aircraft with propellers i use a slow shutter speed so that propellers are slightly blurred to show action and movement. Around 1/125 and i adjusted until i got a full circle of propeller blur. Frozen propellers look unnatural. I used the same method for helicopters but slower shutter speeds gave me better results (1/25 to 1/80). For jets that fly really fast your shutter speed should be 1/1000 at least.
- ISO: That depends from your lens, your cameras sensor, the type of airplane you are shooting and most of all from the lighting conditions. It was a bright and sunny day so i did not have to raise the ISO more than 400.
- MR: I assigned those custom settings to Memory Recall so i was able to switch between scenarios.
- SteadyShot: On
- Aperture: Usually F/11. A blurred background is always nice but this is not the time or the place. That depends from the scene and the lighting conditions too.
- Shutter speed: I usually apply the 180-degree rule. That means that the shutter speed should be set to double my frame rate or very close to it. For example, at 50 fps i use a shutter speed of 1/100. Or at 24 fps i use a shutter speed of 1/50, since 1/48 does not exist.
- Focus Mode: AF-C
- Focus Area: Center or Zone
- ISO: Auto or Manual. That depends from the lighting conditions and the histogram.

- Disable image stabilization from the lens (use the switch) and the camera otherwise your photos may end up blurry. For the camera press the Menu button go to Stabilizer and select the second option (second hand icon). Otherwise your camera will struggle while panning.
- Choose AFC
- Choose the Mechanical Shutter (I). The Electonic Shutter (II) is way faster but it is possible the rolling shutter effect to occur. I need to run more tests though.
- AF Mode: Press the Fn1 button and select Custom Multi. You can also use the 1-Area option and expand it. The second option gave me good results while shooting birds in flight with Animal Detection but this is another story.
- I chose Aperture Priority cause the Sweet Spot of the lens was between F/6,3 - F/7.1. F/8 is also sharp but you must raise the ISO a bit more.
- Minimum Shutter Speed 1/2000. Feel free to check different shutter speed but not slower that 1/1000, unless you shoot a plane with propellers or a helicopter. Same with panning.
- Raise the ISO a bit. ISO 300 was enough for a high shutter speed because it was a sunny day.
- Assign those settings to C1

- Enable image stabilization again
- Choose Manual Focus (Switch to MF). If cant use manual focus then record at 60 fps. The auto-focus system will behave much better at a higher frame-rate.
- You can choose to record in 4k if you want to crop later or Full HD (1980X1060 @60 fps) if you want slow motion.
- ISO should not be higher than 1600.
- You can either select Aperture Mode or Manual settings for video.
- See also the video settings from the Sony A6000. The same rules apply here too. Because Lumix G9 has a smaller sensor you can use a wider aperture (for example F/8) cause field of view is larger.


No comments:
Post a Comment